어도비 완전 무료 대체? getartcraft(ArtCraft) 다운로드·설치 방법 및 포토샵 대체 장단점 총정리
매달 청구되는 Adobe Creative Cloud의 비싼 구독료와 해지 위약금 부담으로 많은 디자이너와 크리에이터들이 무료 오픈소스 대안을 찾고 있습니다. 2026년 10월 전 세계 테크 및 디자인 커뮤니티에서 폭발적인 관심을 받고 있는 ArtCraft(getartcraft.com)는 포토샵, 일러스트레이터, 프리미어 등 어도비 핵심 앱과 오피스 제품군을 전면 대체하기 위해 Rust 언어로 개발된 오픈소스, 로컬 퍼스트 AI 크리에이티브 스위트입니다.
이 글에서는 검색 유입과 실무 도입을 고민하는 분들을 위해 getartcraft의 다운로드 및 설치 방법(웹 무설치부터 OS별 데스크톱 설치), 어도비 앱 1:1 대체 범위, 독창적인 "Compose First, Generate Last" 작동 원리, 그리고 실무 도입 시의 장단점을 완벽히 정리합니다.
1. getartcraft (ArtCraft)란 무엇인가?
- 공식 웹사이트: getartcraft.com
- 공식 웹 앱(무설치): app.getartcraft.com
- 오픈소스 리포지토리: storytold/artcraft 및 storytold/craft-launcher (GitHub)
- 핵심 기술 스택: 초고속 시스템 언어인 Rust 백엔드 + 경량 네이티브 웹뷰 프레임워크인 Tauri + React/TypeScript 프론트엔드
- 등장 배경: 무거운 백그라운드 프로세스와 월 수만 원의 구독료를 강제하는 상용 소프트웨어에서 벗어나, 가볍고 독립적인 로컬 환경에서 전문 작업을 수행할 수 있도록 설계된 차세대 무료 오픈소스 창작 생태계입니다.
2. getartcraft 다운로드 및 설치 방법 (상세 가이드)
ArtCraft는 사용자의 환경과 목적에 맞춰 3가지 방식(웹 브라우저 무설치, 데스크톱 통합 런처, OS별 설치 파일)으로 이용할 수 있습니다.
1) 방법 1: 웹 브라우저에서 무설치로 즉시 사용 (가장 빠른 방법)
프로그램을 컴퓨터에 설치하지 않고 바로 기능을 체험하고 싶다면 공식 웹 버전을 사용합니다.
- 웹 브라우저(Chrome, Safari, Edge 등)에서 app.getartcraft.com에 접속합니다.
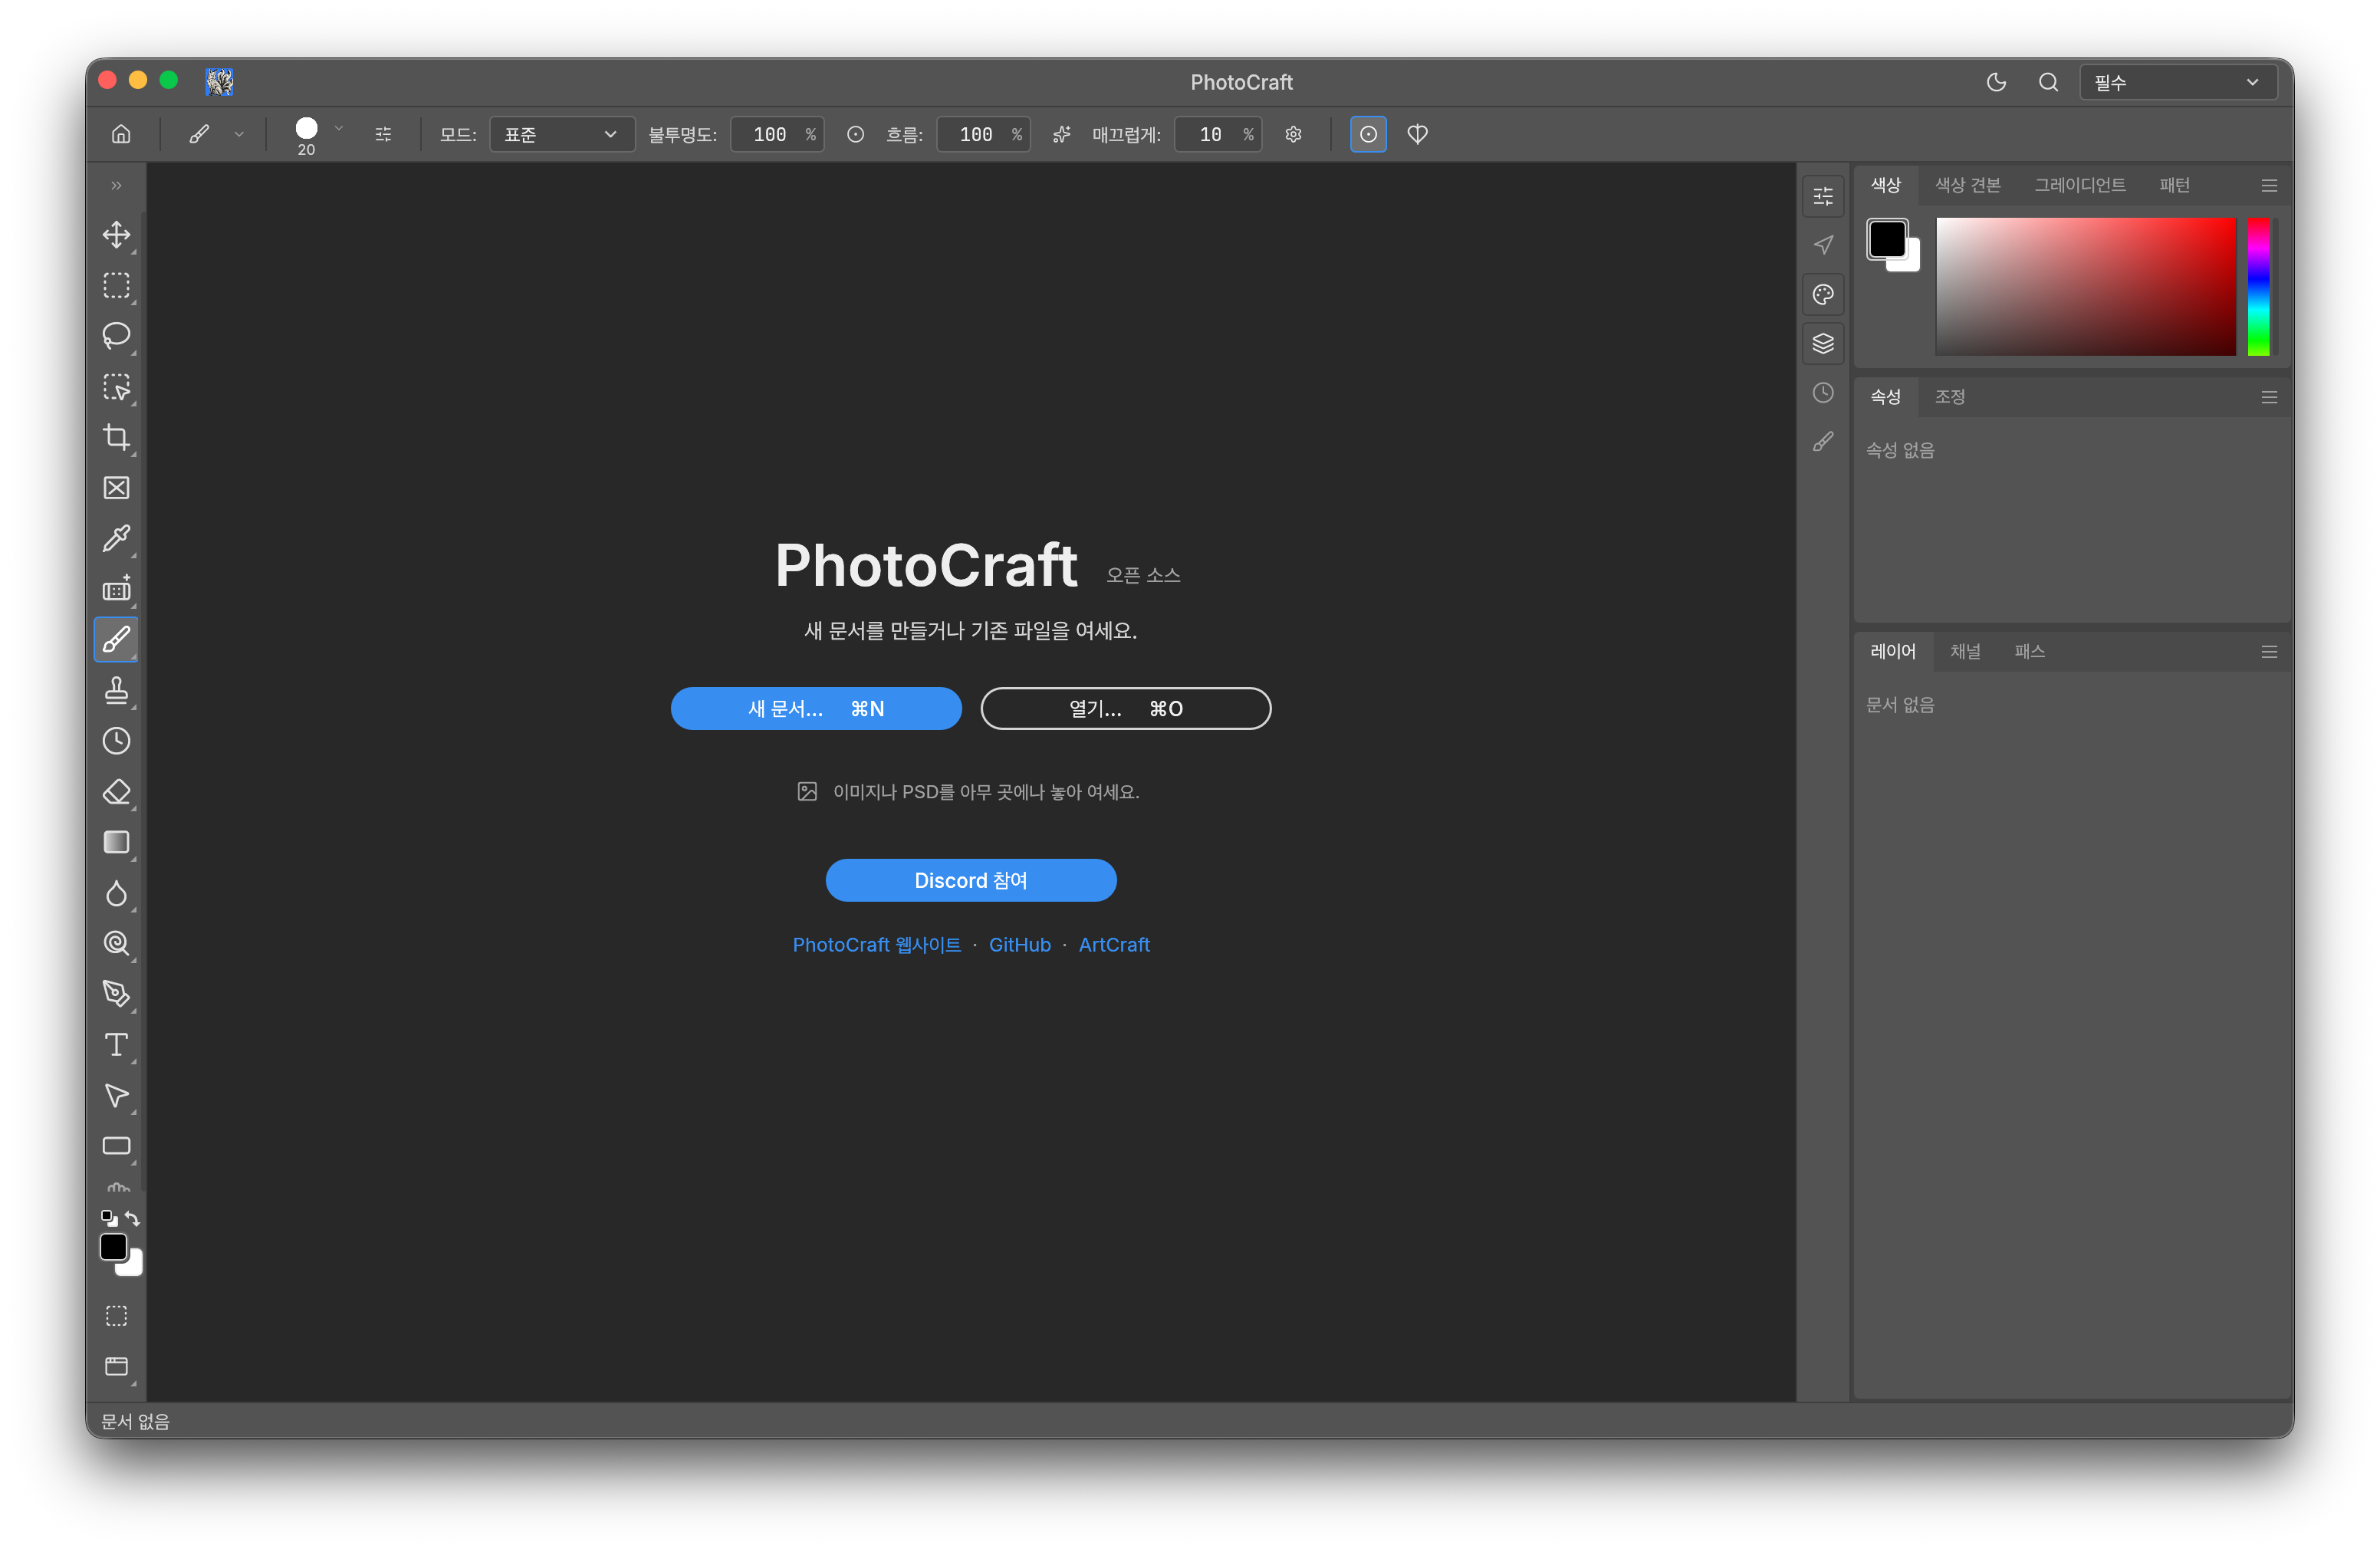
- WebAssembly(WASM)로 빌드된 PhotoCraft(이미지 편집), PdfCraft(PDF 뷰어/편집) 등의 앱이 브라우저 상에서 즉시 실행되며, 설치 과정 없이 로컬 파일을 불러와 작업할 수 있습니다.
2) 방법 2: 공식 데스크톱 런처(Craft Launcher)로 통합 설치 (추천)
어도비의 Creative Cloud 데스크톱 앱처럼, 여러 개별 모듈(PhotoCraft, FilmCraft 등)을 한곳에서 설치하고 자동 업데이트할 수 있는 전용 런처입니다.
- 다운로드: getartcraft.com 메인 페이지의 Download Launcher 버튼을 클릭하거나, GitHub 리포지토리(github.com/storytold/craft-launcher/releases)에서 OS에 맞는 최신 릴리즈 파일을 받습니다.
- 실행 및 설치:
- Windows: craft-launcher-setup.exe를 실행하여 설치를 완료합니다.
- macOS: craft-launcher.dmg를 열고 아이콘을 /Applications 폴더로 드래그합니다.
- Linux: craft-launcher.AppImage 파일에 실행 권한(chmod +x)을 부여하고 실행합니다.
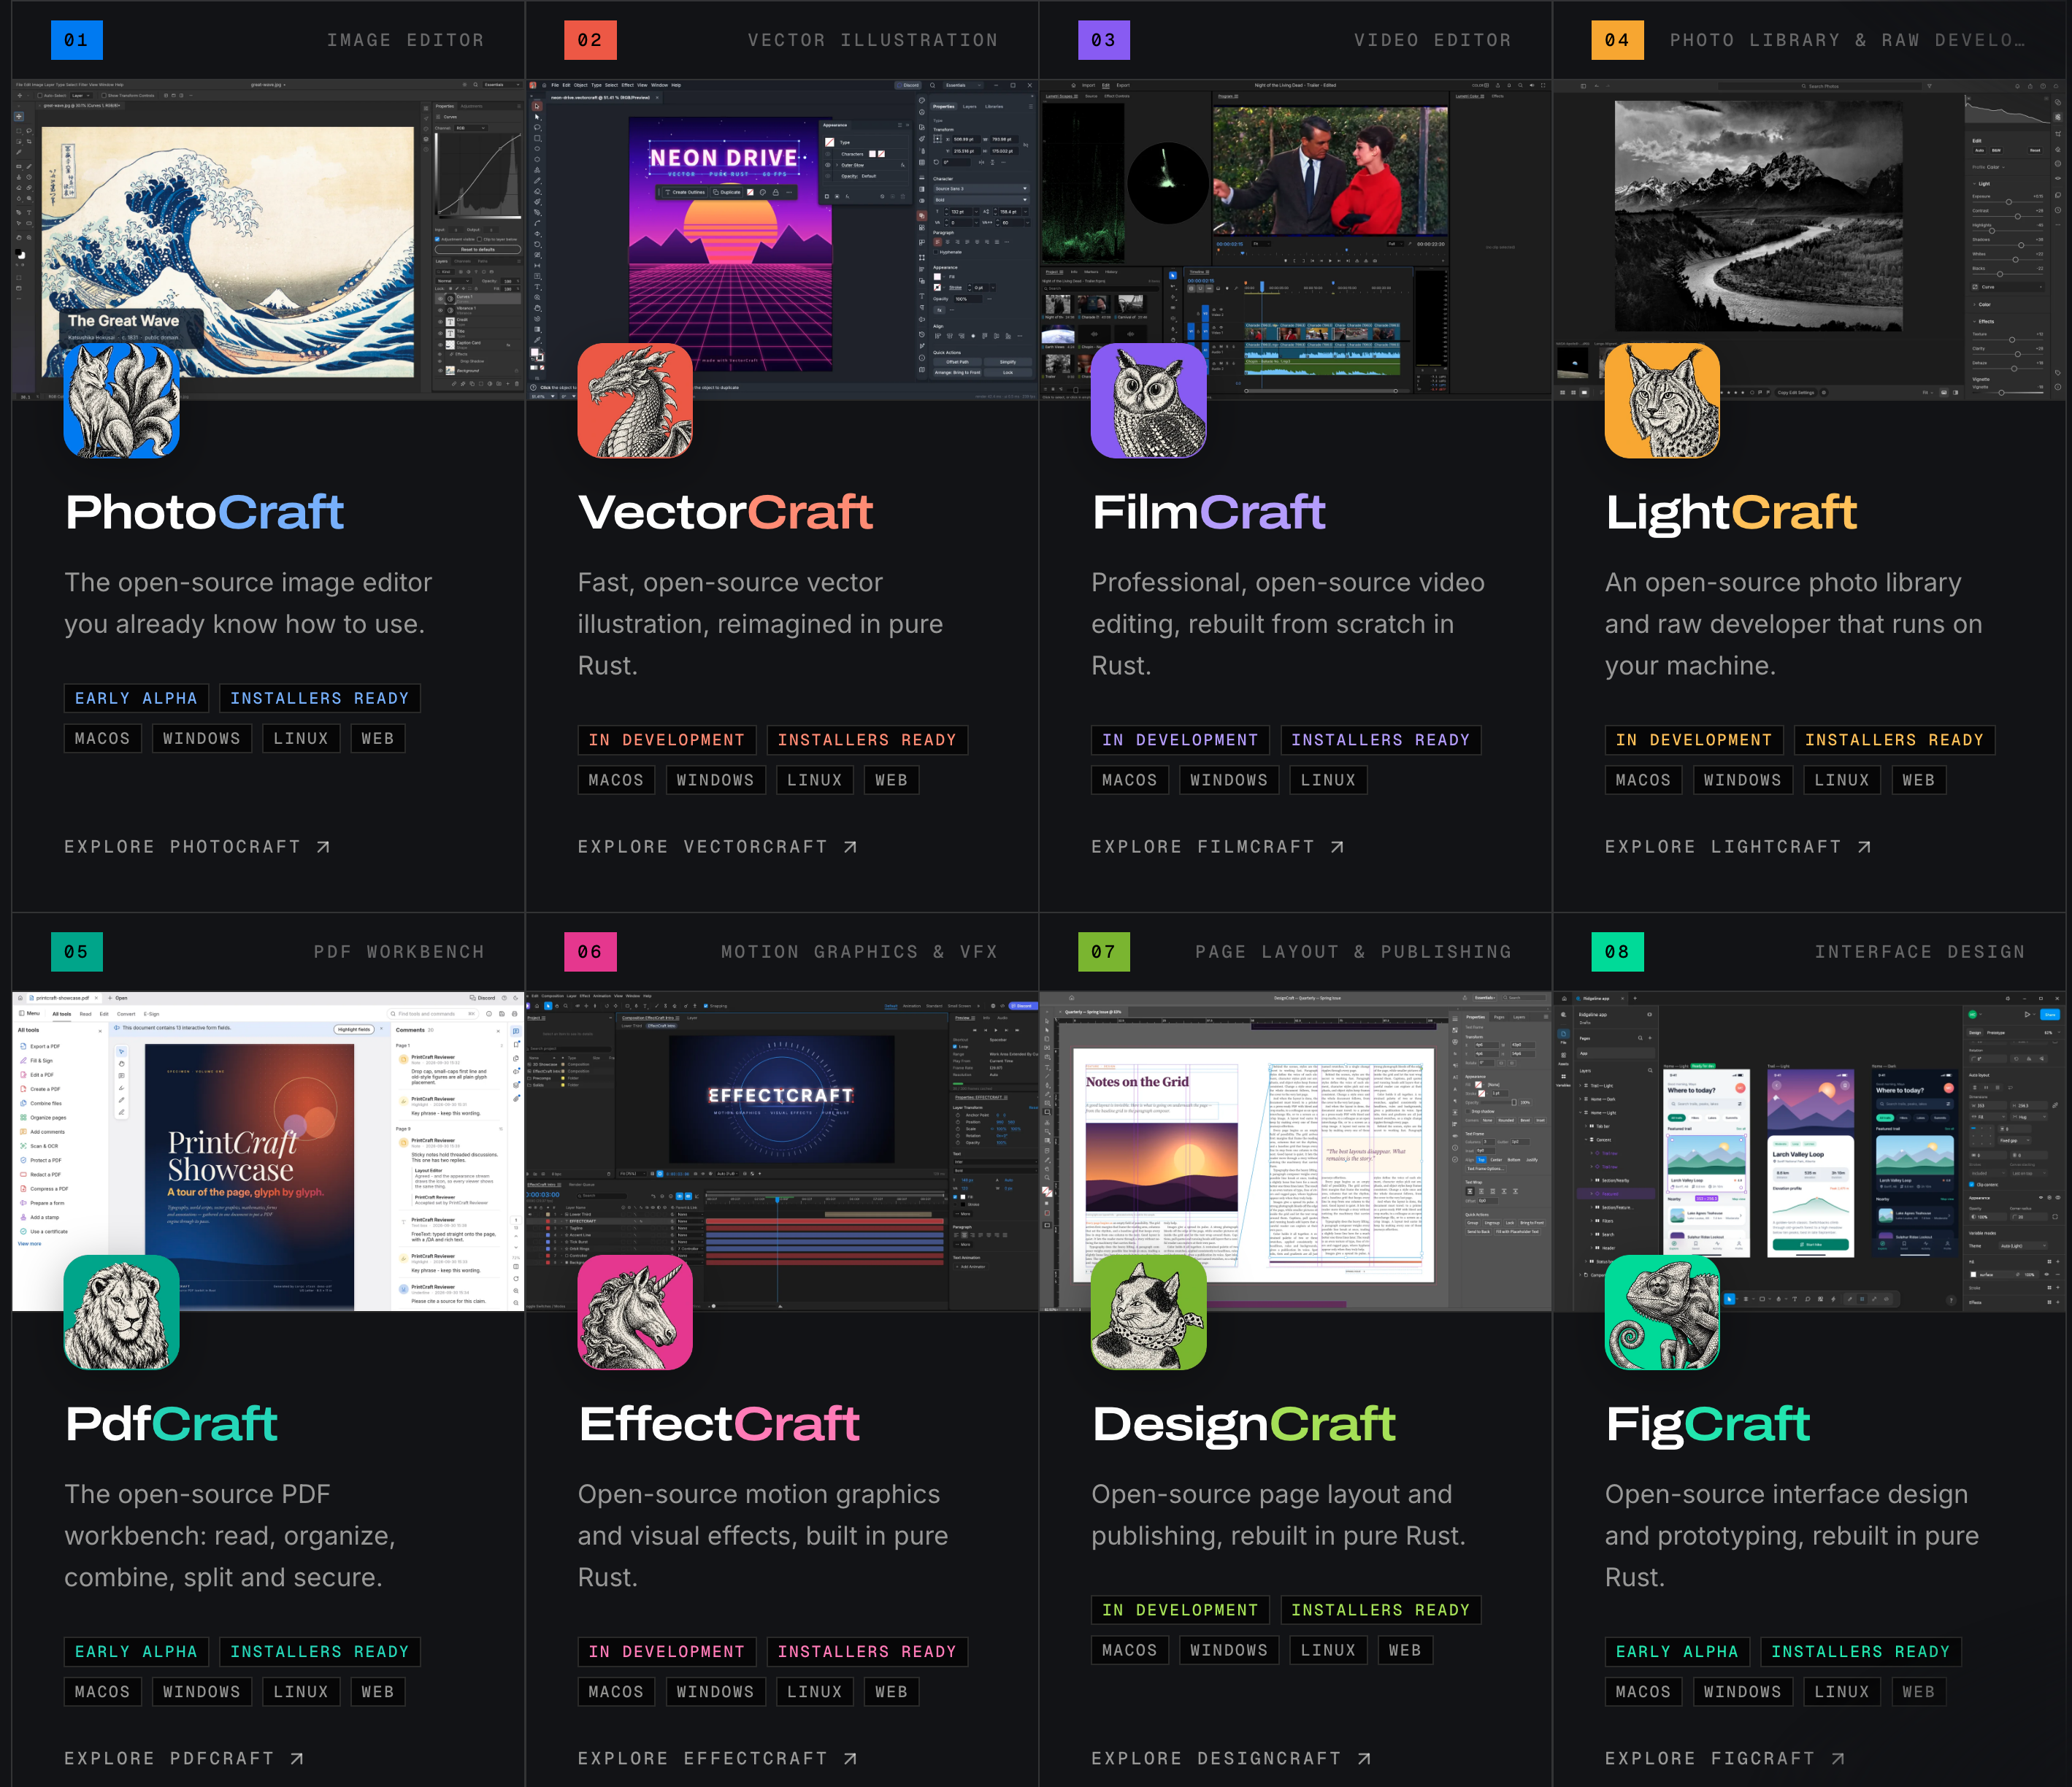
- 앱 선택 설치: 런처를 실행하면 포토샵 대체용인 PhotoCraft, 영상 편집용 FilmCraft, 벡터 디자인용 VectorCraft 등 필요한 앱만 골라 원클릭으로 설치하고 실행할 수 있습니다.
3) 방법 3: OS별 독립 실행 파일 직접 다운로드 (GitHub Releases)
런처 없이 특정 단일 앱만 독립 포터블 프로그램으로 쓰고 싶다면 GitHub 릴리즈를 이용합니다.
- 공식 릴리즈 페이지: github.com/storytold/artcraft/releases
- Windows: .msi 인스톨러 또는 무설치 포터블 .exe 파일을 받아 원하는 폴더에서 바로 실행
- macOS: Apple Silicon(M1/M2/M3/M4) 및 Intel Mac용 .dmg 파일을 받아 응용 프로그램 폴더에 복사
- 참고 (Gatekeeper 경고): 최초 실행 시 "확인되지 않은 개발자" 팝업이 뜰 경우, 마우스 우클릭 \rightarrow [열기]를 누르거나 [시스템 설정 \rightarrow 개인정보 보호 및 보안]에서 '확인 없이 열기'를 클릭합니다.
- Linux: .deb, .rpm 패키지 또는 .AppImage 포맷으로 배포됩니다.
시스템 사양 요구사항
- 기본 2D/영상 편집: Rust 기반으로 최적화되어 있어 사양이 낮은 노트북이나 구형 PC에서도 쾌적하게 구동됩니다. (메모리 4GB 이상)
- 로컬 AI 생성 렌더링: Stable Diffusion 등 무거운 이미지/영상 AI 모델을 내 컴퓨터에서 직접 연산할 경우, NVIDIA 외장 그래픽카드(VRAM 8GB~12GB 이상 권장)가 필요합니다. 그래픽카드가 부족하다면 클라우드 API 모드를 선택하여 원격 렌더링을 진행할 수 있습니다.
3. 무엇을 어떻게 대체하는가?
ArtCraft는 어도비의 대표 프로그램들과 오피스 제품군을 1:1로 매핑하여 대체합니다.
1) Adobe Creative Cloud 제품군 대체
| ArtCraft 모듈 | 대체 대상 (Adobe) | 핵심 역할 및 대체 기능 |
| PhotoCraft | Adobe Photoshop | 레이어 기반 래스터 그래픽 편집, 생성형 채우기(Generative Fill), 누끼(배경 분리), 디지털 리터칭 |
| LightCraft | Adobe Lightroom | 대규모 사진 카탈로그 관리, RAW 파일 현상, 노출/색온도/채도 정밀 컬러 그레이딩 |
| VectorCraft | Adobe Illustrator | 베지에 곡선 벡터 드로잉, 로고 및 아이콘 디자인, SVG 출력 |
| FilmCraft | Adobe Premiere Pro | 멀티트랙 타임라인 영상 편집, 컷 편집, 자막 및 비디오 트랜지션 |
| EffectCraft | Adobe After Effects | 모션 그래픽, 키프레임 애니메이션, 시각 특수효과(VFX) |
| DesignCraft | Adobe InDesign | 인쇄 출판물 레이아웃 조판(DTP), 전자책 및 잡지 편집 |
| PdfCraft | Adobe Acrobat | PDF 뷰어, 페이지 병합, 텍스트 수정 및 주석 마크업 |
| SoundCraft | Adobe Audition | 멀티트랙 오디오 녹음, 믹싱, 잡음 제거(노이즈 캔슬링) |
2) 오피스 생산성 도구 대체
- WordCraft : MS Word / Google Docs (마크다운 기반 스마트 문서 도구)
- GridCraft : MS Excel / Google Sheets (스프레드시트 데이터 관리)
- DeckCraft : MS PowerPoint / Keynote (슬라이드 프레젠테이션)
4. 핵심 작동 원리: "Compose First, Generate Last"
기존 텍스트 기반 AI(미드저니, DALL-E)의 치명적인 한계는 프롬프트를 아무리 길게 써도 원하는 구도, 손가락 자세, 카메라 앵글을 통제할 수 없다는 점이었습니다. ArtCraft는 "구도 먼저, 생성은 나중에"라는 역발상 파이프라인을 구축했습니다.
[ArtCraft의 3단계 제작 파이프라인]

1. 구도 및 레이아웃 배치 (Compose)
   - 2D 캔버스에 캐릭터, 배경, 소품 레이어를 분리 배치
   - 내장 3D 뷰포트를 열고 3D 마네킹을 조작하여 인체 포즈, 카메라 화각(FOV), 조명 방향을 마우스로 완벽히 세팅

2. 가이드라인 지정 (Direct)
   - 레이어별 마스크, 스케치 선화, 색상 가이드, 텍스트 프롬프트를 매핑

3. AI 최종 렌더링 (Generate Last)
   - AI 모델이 세팅된 3D 지오메트리와 레이어 구도를 엄격히 준수하여 최종 고화질 그래픽으로 렌더링
이 방식을 통해 원근법 왜곡이나 불필요한 슬롯머신식 재추첨 없이, 디자이너의 의도대로 100% 일치하는 완성본을 뽑아낼 수 있습니다.
5. ArtCraft의 장점
- 영구 무료 & 오픈소스 (월 구독료 0원):
매달 수만~수십만 원씩 나가는 어도비의 악명 높은 월 구독료와 중도 해지 위약금 리스크가 완전히 사라집니다. - Rust & Tauri 기반의 초경량·고속 성능:
메모리를 많이 잡아먹는 Electron 기반 앱이나 무거운 백그라운드 프로세스가 없습니다. 램 점유율이 낮아 보급형 랩톱에서도 빠르게 켜집니다. - 상업 납품이 가능한 수준의 구도 제어력:
3D 뷰포트와 2D 레이어 연동 덕분에 캐릭터의 시선, 포즈, 원근감을 1픽셀 단위로 통제할 수 있습니다. - 로컬 퍼스트 & 강력한 데이터 프라이버시:
클라우드 강제 업로드 없이 내 컴퓨터의 로컬 드라이브(SQLite 기반)에 프로젝트가 안전하게 저장됩니다. - 일관된 단일 워크플로:
포토샵, 라이트룸, 일러스트레이터 기능을 오갈 때 UI나 단축키 괴리감 없이 단일 런처 생태계에서 유기적으로 작업할 수 있습니다.
6. ArtCraft의 단점 및 한계점
- 초기 프로젝트로 인한 완성도 격차:
2026년 10월에 갓 출시된 신생 오픈소스 프로젝트이므로, 수십 년간 축적된 어도비의 전문 인쇄 조판(오프셋 CMYK 분해, 별색 인쇄 프로파일 등) 기능을 100% 대체하기에는 아직 세부 기능이 부족합니다. - 업계 표준 포맷(.psd, .ai, .prproj) 협업 장벽:
외부 클라이언트나 에이전시, 대형 인쇄소와의 협업 시 어도비 원본 파일과의 완벽한 스마트 오브젝트/레이어 스타일 호환성 검증이 더 필요합니다. - 고해상도 AI 연산 시 하드웨어 또는 크레딧 비용:
로컬 툴 자체는 무료이지만, 4K 고화질 이미지나 비디오 AI 렌더링을 내 PC에서 고속 처리하려면 고사양 GPU(NVIDIA VRAM 12GB 이상 권장)가 필요하며, 저사양 PC의 경우 공식 클라우드 렌더링 크레딧을 충전해야 합니다. - 커뮤니티 및 학습 자료 부족:
방대한 프리셋, 브러시 에셋, 유튜브 튜토리얼이 풍부한 어도비 생태계에 비해 아직 공식 문서 외의 강좌 자료가 적습니다.
7. 결론 및 실무 추천 대상
- 적극 추천:
- 매달 나가는 어도비 월 구독료가 부담스러운 1인 크리에이터, 학생, 인디 게임 개발자, 웹툰 작가
- 프롬프트 운에 맡기지 않고 구도와 포즈를 직접 제어하는 상업용 AI 디자인 툴을 원하는 아티스트
- 무거운 상용 프로그램 대신 가볍고 빠른 로컬 오픈소스 툴을 선호하는 사용자
- 도입 보류:
- 엄격한 컬러 프로파일과 후가공 인쇄 규격을 맞춰야 하는 출판 전문 DTP 디자이너
- 어도비 엔터프라이즈 팀 라이브러리 및 팀 프로젝트 파이프라인에 완전히 종속된 대형 스튜디오
'생활정보' 카테고리의 다른 글
| HUG 전월세 안심신탁 도입: 보증금 직접 예치 구조와 신청 조건 정리 (0) | 2026.08.25 |
|---|---|
| 2026년 신설 청년미래적금 자격 조건 및 청년 주택드림 청약통장 혜택 비교 (0) | 2026.08.20 |
| 스마트폰 배터리 수명 늘리기 (0) | 2026.08.18 |
| 2026년 8·13 부동산 대책 핵심 정리: 23만 호 신속 공급과 PF 대출 규제 완화 분석 (0) | 2026.08.14 |
| 2026년 근로장려금 소득 기준 완화 및 최대 지급액(180~360만 원) 인상 총정리 (0) | 2026.08.05 |
| 자취 직장인 필수 확인: 2026년 월세 세액공제 한도 및 맞벌이 부부 공제 개편 (0) | 2026.08.05 |
| 2026년 부동산 세제 개편안 핵심 정리: 종부세·양도세 기준 및 주요 변경 사항 (0) | 2026.08.04 |
| 월 150만원 5065 재취업 지원금 대상 및 신청 절차 (0) | 2026.07.31 |